


Creating a cron trigger
Table of contents
Introduction
Cron triggers are used to reliably trigger HTTP endpoints to run custom business logic periodically based on a cron schedule. For example, you can create a cron trigger to generate an end-of-day sales report every weekday at 10pm.
To add a cron trigger, follow these steps:
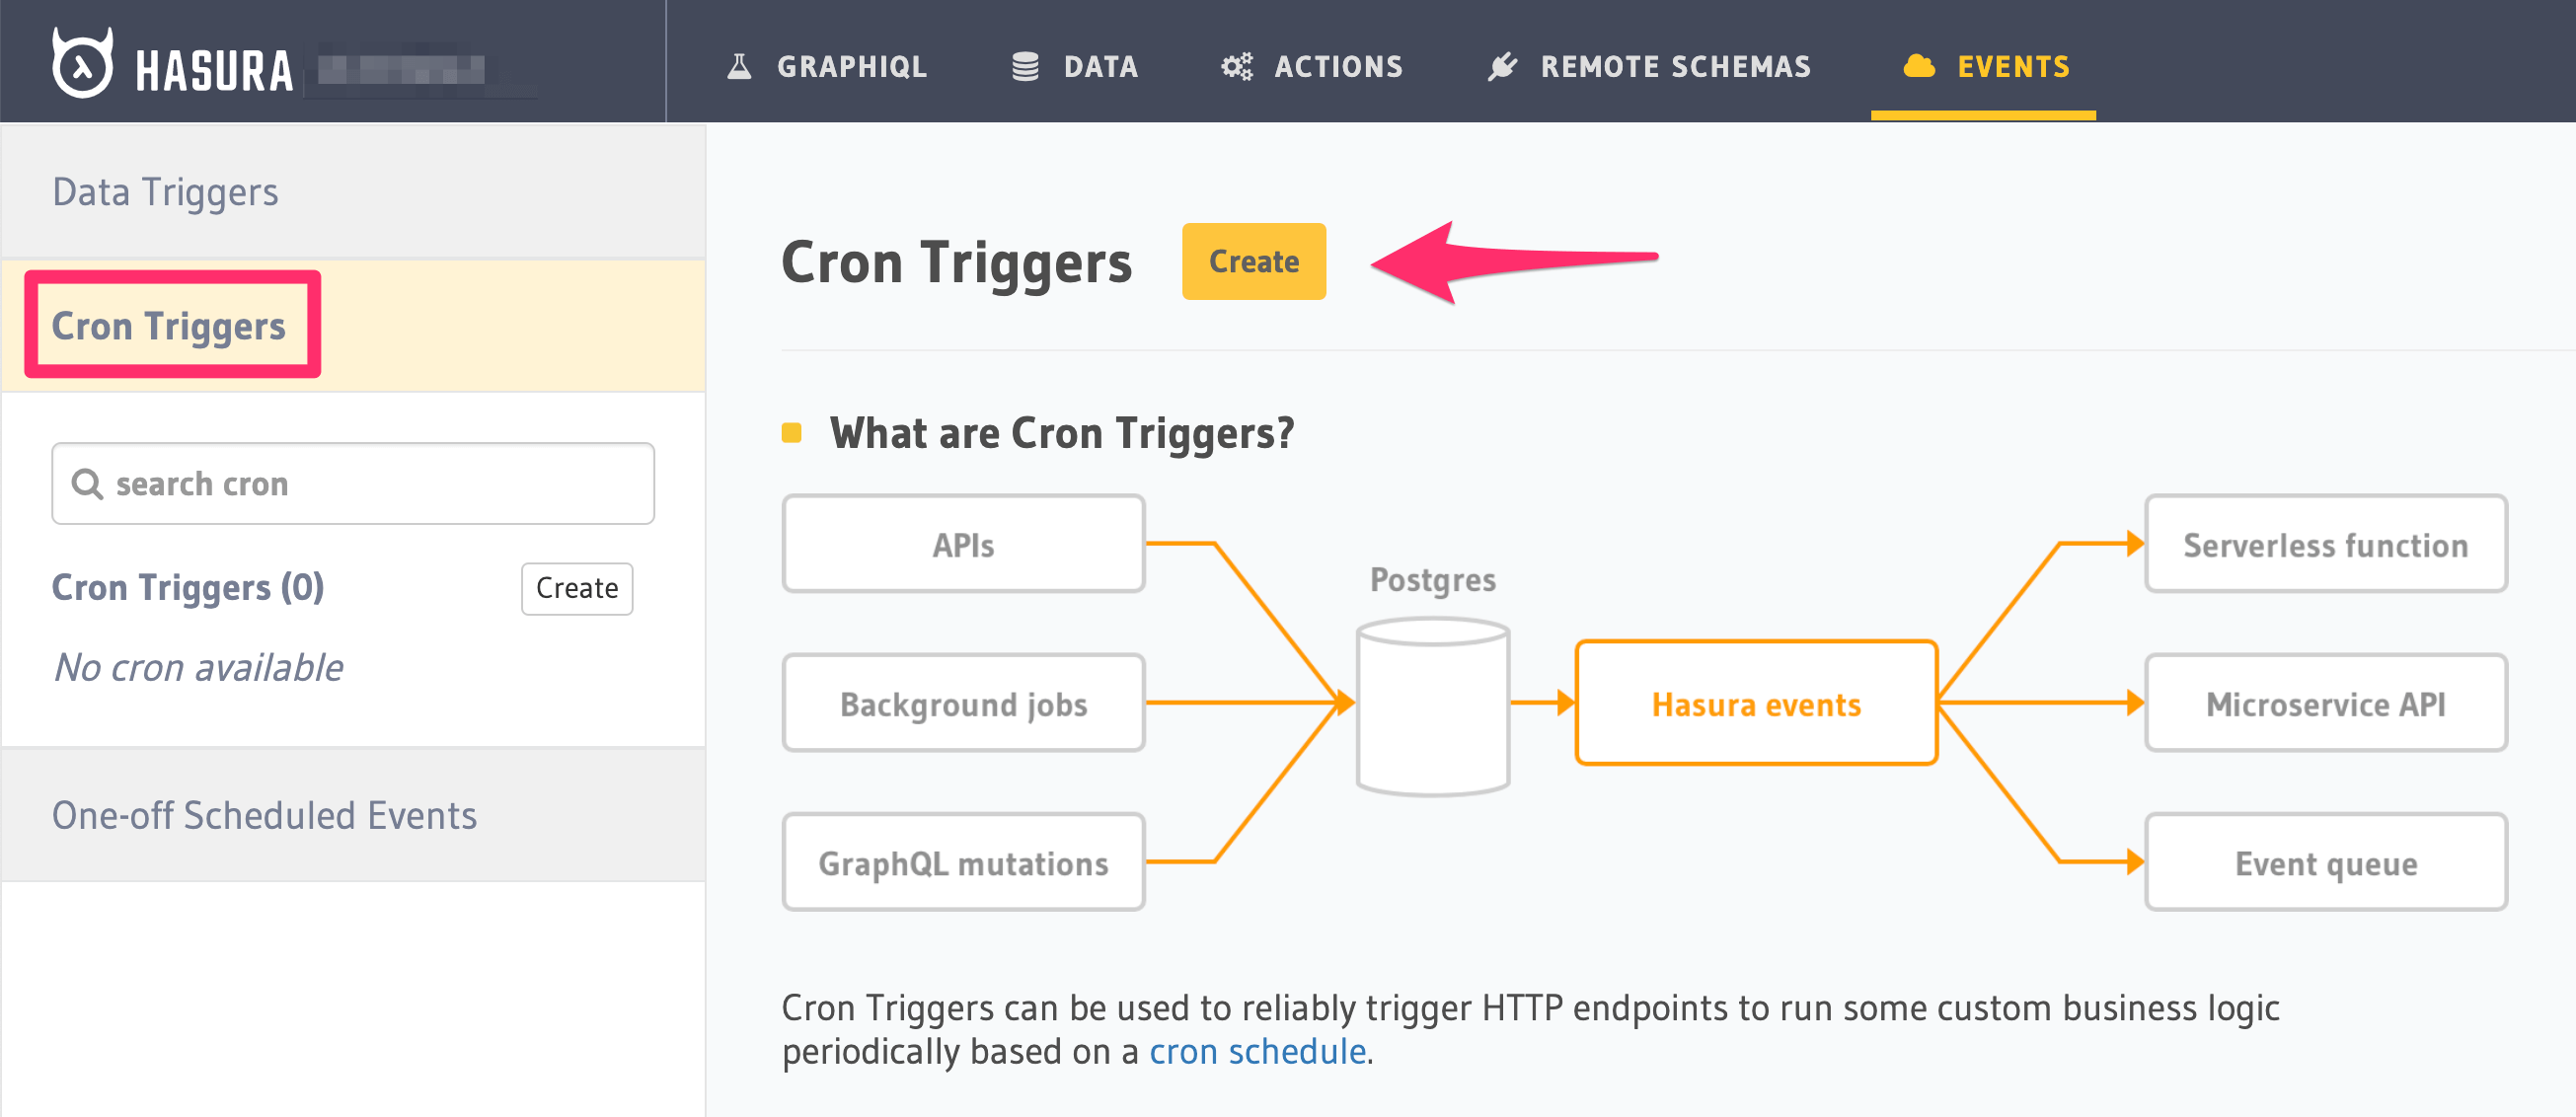
Step 1: Navigate to Cron Triggers
- Go to the
Eventstab in your Hasura console. - Click
Cron Triggers. - Click
Create.
Step 2: Define the cron trigger
Let’s define the cron trigger.
In the form opened by the above step, fill out the following fields:
- Name: Create a name for the cron trigger.
- Webhook: Enter the HTTP endpoint that should be triggered.
- Cron schedule: Enter a schedule for the cron. You can use the link next to the field to help build a cron expression, or use the
Frequently used cronsdropdown as a shortcut. Cron events are created based on the UTC timezone. - Payload: The JSON payload which will be sent to the webhook.
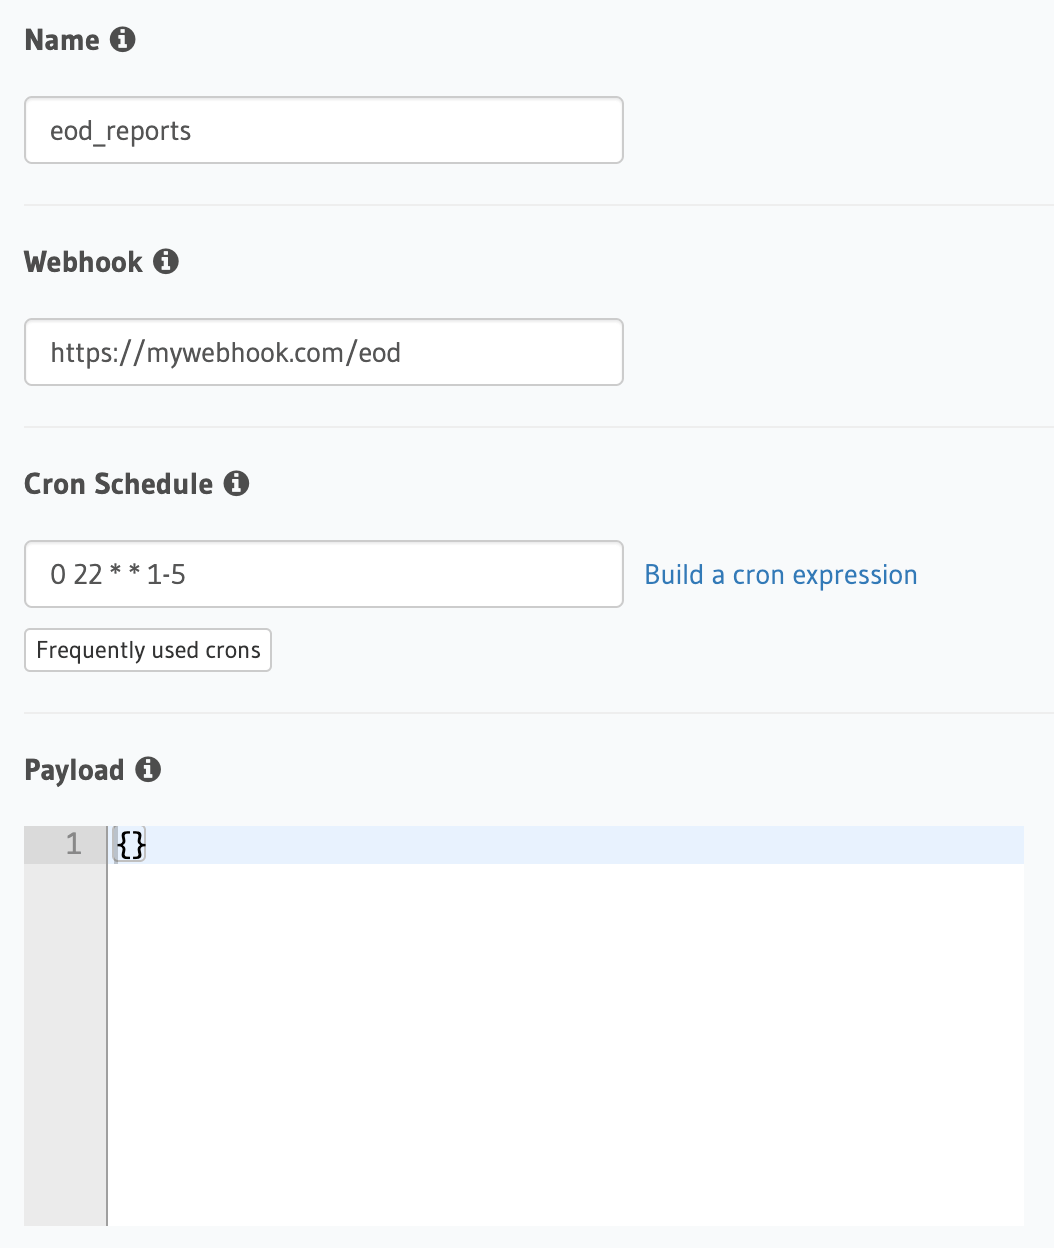
In this example, we’re creating a cron trigger called eod_reports, to trigger the webhook https://mywebhook.com/eod. The cron schedule is set to 0 22 * * 1-5, which means “At 22:00 on every day-of-week from Monday through Friday” (you can check this here).
You can define a cron trigger by adding it to the cron_triggers.yaml file inside the metadata directory:
- name: eod_reports
  webhook: https://mywebhook.com/eod
  schedule: 0 22 * * 1-5
  include_in_metadata: true
  payload: {}
Apply the metadata by running:
hasura metadata apply
You can define a cron trigger via the create_cron_trigger metadata API:
POST /v1/query HTTP/1.1
Content-Type: application/json
X-Hasura-Role: admin

{
   "type": "create_cron_trigger",
   "args": {
      "name": "eod_reports",
      "webhook": "https://mywebhook.com/eod",
      "schedule": "0 22 * * 1-5",
      "payload": {},
      "include_in_metadata": true
   }
}
Step 3: Define advanced options (Optional)
If you like, you can also define the following values:
- Headers: List of headers to be sent to the webhook.
- Retry configuration: In case the call to the webhook fails.
- Include in metadata: When set to true, the cron trigger will be included in the metadata and can be exported along with it.
- Comment: Custom description of the cron trigger.
Expand the Advanced section.

You can define advanced options for a crone trigger when adding it to the cron_triggers.yaml file inside the metadata directory:
- name: eod_reports
  webhook: https://mywebhook.com/eod
  schedule: 0 22 * * 1-5
  include_in_metadata: true
  payload: {}
  retry_conf:
    num_retries: 3
    timeout_seconds: 120
    tolerance_seconds: 21675
    retry_interval_seconds: 12
  comment: This is a comment
Apply the metadata by running:
hasura metadata apply
You can define advanced options for a cron trigger when defining it via the create_cron_trigger metadata API:
POST /v1/query HTTP/1.1
Content-Type: application/json
X-Hasura-Role: admin

{
   "type": "create_cron_trigger",
   "args": {
      "name": "eod_reports",
      "webhook": "https://mywebhook.com/eod",
      "schedule": "0 22 * * 1-5",
      "include_in_metadata": true,
      "payload": {},
      "retry_conf": {
            "num_retries": 3,
            "timeout_seconds": 120,
            "tolerance_seconds": 21675,
            "retry_interval_seconds": 12
      },
      "comment": "sample_cron commment"
   }
}
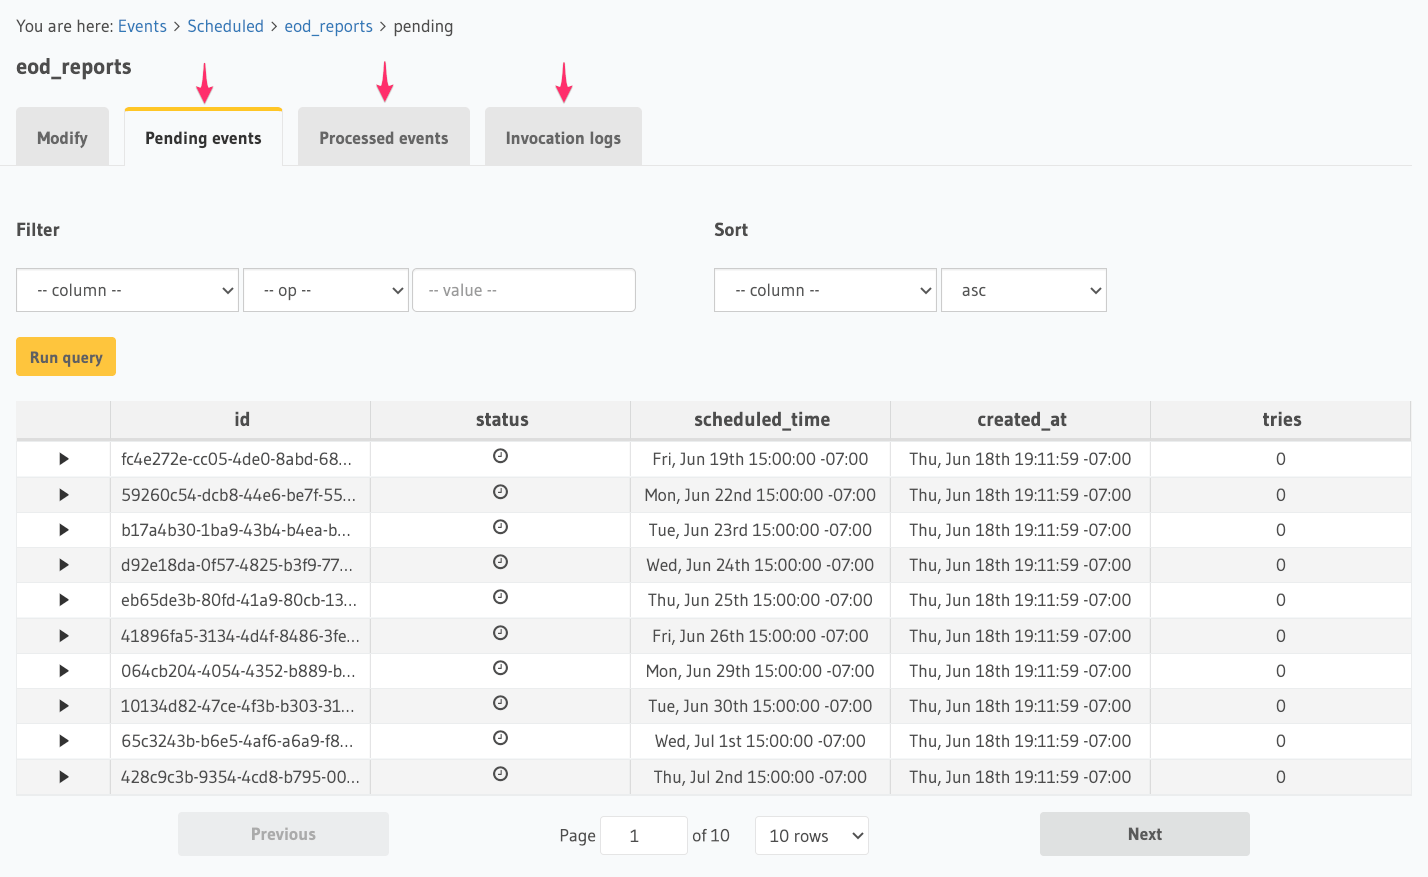
Schedule & logs
Once you’ve created your cron trigger, you can see Pending events, Processed events, and Invocation logs in their respective tabs.
 Thank you for subscribing to our newsletter!